

Showing posts with label DIY. Show all posts
Showing posts with label DIY. Show all posts
May 24, 2012
June 16, 2011

May 27, 2011

February 28, 2011
DIY Faux Leather Harness/Belt
I don't know about the rest of you, but I actually accomplished some things this weekend. Okay, not actually anything I needed to do, but some DIY projects I have had planned forever, including this harness I'm wearing. I wanted better pics, but despite the sun, it was freezing and windy, so I took my pics and got the hell back inside. I do however, like the way the sun caught the purple and pink highlights in my hair.
 Blouse- thrifted; Leggings- unknown; Harness-DIY (instructions below; Shoes- Forever 21


 * just realized that although red is my favorite color, this is maybe one out of two red tops i own- need to fix that :)

To make the harness, you'll need the following supplies:
 I actually spent no money making this, as I already had the supplies. I used an old faux leather belt for the material, and the hardware I ripped off of an old handbag. I'm thrifty like that.
1. Measure around from one side of your chest, around your neck, to the other side. You want the harness to sit right under your bust. Cut a strip of your leather (or whatever material you're using) to the measured length. Sew each end to a metal ring as shown.
2. Measure around your back from one side to the other, the distance starting from one ring of the harness to the other. Cut a strip to that measured length and sew to each ring as shown.
3. You should now have the neck and back piece sewn like in the picture.
4. Measure around your front under the bust from one ring to the other and cut a strip of material a couple inches longer. Sew each end to a ring, then cut in the middle, but a bit off center. These will be your buckle and strap used to tighten the harness. Sew your buckle to one end, and punch or cut holes in the other side. You should now have a completed harness.
 Now you can add studs, beads or any other decorative pieces you want. I added snaps, which came in a kit. Instructions to set the snap are below. You'll need the following supplies:
 The snaps come in four pieces, but you'll only need the two shown above.
1. Punch holes in the desired location. I chose to set mine around the rings.
2. Insert the smooth side of the snap through the hole on the side of the leather facing outward when you wear it
3. Insert the the other snap piece on the opposite side of the leather connecting to the smooth piece
4. The kit comes with a metal piece with a concave center. Lay the harness with the smooth side of the snap face down on the concave piece as shown.
5. Insert the metal rod (included in kit) into the hole of the snap facing up. Using the mallet, strike heavily on the rod. Keep the rod straight when hammering, as you are essentially smashing the center metal hole down- if you move sideways, your metal will end up crooked.
6. Repeat as desired on remaining sides of the ring or wherever else you want the snaps.

There you have it, your own custom harness. As I said, mine was free to make, but even if you have to buy the supplies, this is still a fairly cheap project Most of the items can be found at craft stores, but be sure to look around your house for items to use first. Old purses. clothes or shoes can provide the material and hardware, even the snaps. Use your imagination.
If you enjoyed the post and found it informative (which I hope you did) and wish to share by reposting on your blog, Facebook or Twitter, which by all means I would be grateful for, just be sure to link back to here and give the proper credit. And be sure to check back often, as I have more projects completed/in progress to share later.
Twitter*Facebook*Bloglovin'
 Blouse- thrifted; Leggings- unknown; Harness-DIY (instructions below; Shoes- Forever 21

 * just realized that although red is my favorite color, this is maybe one out of two red tops i own- need to fix that :)
To make the harness, you'll need the following supplies:
 I actually spent no money making this, as I already had the supplies. I used an old faux leather belt for the material, and the hardware I ripped off of an old handbag. I'm thrifty like that.
1. Measure around from one side of your chest, around your neck, to the other side. You want the harness to sit right under your bust. Cut a strip of your leather (or whatever material you're using) to the measured length. Sew each end to a metal ring as shown.
2. Measure around your back from one side to the other, the distance starting from one ring of the harness to the other. Cut a strip to that measured length and sew to each ring as shown.
3. You should now have the neck and back piece sewn like in the picture.
4. Measure around your front under the bust from one ring to the other and cut a strip of material a couple inches longer. Sew each end to a ring, then cut in the middle, but a bit off center. These will be your buckle and strap used to tighten the harness. Sew your buckle to one end, and punch or cut holes in the other side. You should now have a completed harness.
 Now you can add studs, beads or any other decorative pieces you want. I added snaps, which came in a kit. Instructions to set the snap are below. You'll need the following supplies:
 The snaps come in four pieces, but you'll only need the two shown above.
1. Punch holes in the desired location. I chose to set mine around the rings.
2. Insert the smooth side of the snap through the hole on the side of the leather facing outward when you wear it
3. Insert the the other snap piece on the opposite side of the leather connecting to the smooth piece
4. The kit comes with a metal piece with a concave center. Lay the harness with the smooth side of the snap face down on the concave piece as shown.
5. Insert the metal rod (included in kit) into the hole of the snap facing up. Using the mallet, strike heavily on the rod. Keep the rod straight when hammering, as you are essentially smashing the center metal hole down- if you move sideways, your metal will end up crooked.
6. Repeat as desired on remaining sides of the ring or wherever else you want the snaps.

There you have it, your own custom harness. As I said, mine was free to make, but even if you have to buy the supplies, this is still a fairly cheap project Most of the items can be found at craft stores, but be sure to look around your house for items to use first. Old purses. clothes or shoes can provide the material and hardware, even the snaps. Use your imagination.
If you enjoyed the post and found it informative (which I hope you did) and wish to share by reposting on your blog, Facebook or Twitter, which by all means I would be grateful for, just be sure to link back to here and give the proper credit. And be sure to check back often, as I have more projects completed/in progress to share later.
October 8, 2010
Black Magic Woman


 First off, let me just apologize for the quality of these pics. Not pleased at all how they turned out, but was in a hurry and didn't have time to mess with the lighting and stuff.
Anyways, awhile back I had been oogling a long, sheer maxi skirt on the American Apparel website. It came in black but also a gorgeous royal blue. Well, after much deliberation I finally decided to purchase it, only to find out they no longer had it. That's what I get for hesitating. Oh well, I thought, I'll just make one, how hard can it be? Let it be known that I am not one of the magically talented seamstresses who can just whip up creations like nobody's business. First of all, my sis has my sewing machine, so I had to sew every stitch by hand. That alone should have been a sign for me to forget it. But when I'm determined, there's no stopping me. So the end result is this skirt that at first glance looks not to bad....but if you saw it in person you'd be having a laugh. The stitching is incredibly crooked, it's a tad longer in front than in back, and I had to put a lace trim on the bottom to cover up my messy hemming. All in all though, I saved myself money, so beggars can't be choosers, right? I also bought other material at the same time since it was on sale, but I have yet to know what to do with it. But maybe I'll wait until I get my sewing machine back.
Have a great weekend everyone!
JOIN ME ON FACEBOOK

FOLLOW ME ON BLOGLOVIN'

July 24, 2010
Give Me The Simple Life


This is one of my cheapest outfits. The shirt is an old tshirt I cut up, the shorts are from Marshall's and were on sale for $6 (and even though they have an elastic waistband, they are NOT maternity shorts)and my shoes were made by me for free from shoes and material I already owned. The most expensive thing I'm wearing is my necklace from Target, at a whopping $15. Even though I made my own shoes, I somehow managed to make them a tad too small, and the left one is smaller than the other. But hey, who am I to complain since they didn't cost me anything? I can sacrifice a few toes for that.
I tried to do a tutorial and take pics as I made the shoes. But my attention span only lasts so long, so I managed to only take pics of the first half. But I'll try to explain, for those wondering.
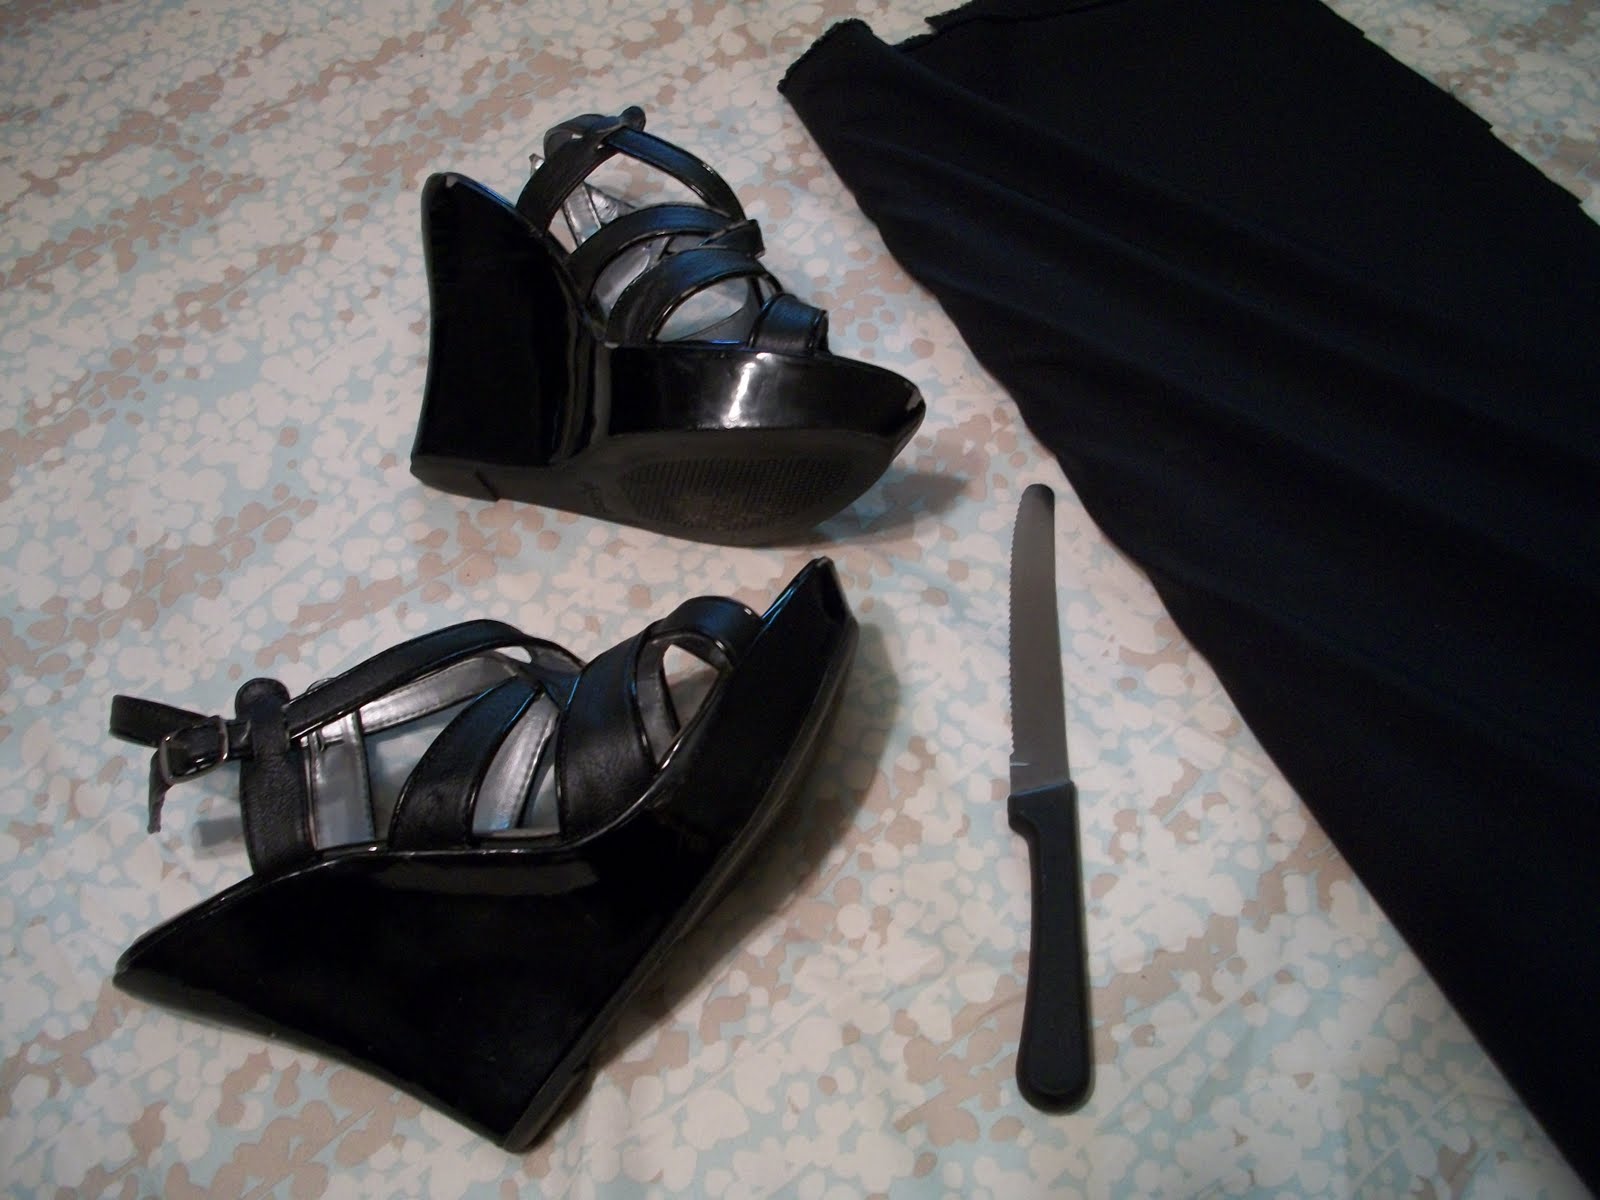
1. What you'll need is an old pair of wedges or heels you want to makeover.
2. A knife, scissors, anything sharp that you can squeeze between the sole and heel of the shoe.
3. Material to make the straps and ties. I used leftover scrap material which was a mix of cotton, polyester, and rayon. But jersey material or mesh or even chiffon would work fine.
4. Carefully pry the edges of the sole loose with your knife, scissors or whatever. Once you get it worked loose, you can probably just rip the rest of the sole off easily.
5. Cut off any remaining straps or loose material.
6. This is where I forgot to take pics: cut a strip of material for the toes; put your foot on the sole and wrap the material around the toes to measure. Hold in place and glue the back of the material to the bottom of the sole. I just used my glue gun, but you can use whatever adhesive you want that will stay.
7. Take a long strip of material (I measured it up to my shoulder) and place under the sole so that the ties on either side are even. Then glue in place on the bottom.
8. Place the sole on the wedge or heel remaining so that everything lines up again, then carefully and slowly glue the sole in place.
9. Repeat with other shoe, then put on feet and wrap the ties around your feet and tie in knot, either in front or back.


Sorry I don't have pics to go with the rest. It was late and I was just trying to get them done. Hope you can figure this out okay, I'd love to see if any of you make your own DIY shoes!


July 17, 2010
Fringe Benefits


Yesterday Mike and I decided to go get some new tattoos. I was super stoked to get a new one on my forearm, and since it's really hard to get Mike going, I was even more excited that he so readily agreed since it was already almost 7 o'clock. Well, imagine my disappointment after getting to the place and being told that you can't get tattooed when pregnant. How come I didn't know this? Apparently Mike did and forgot to mention it. So now that's one more thing that I can't do for another four months. But in the meantime, I'm getting immortalized on Mike's arm, along with portraits of our pit bulls. I wonder if I should be offended that my picture is being included with the dogs? But seriously, it's looking awesome so far.
Since I can't do much else, I've been in a crafty, DIY mood. So I started this morning with shredding one of Mike's beloved Harley t shirts. He was not amused, but hey, it was in the name of fashion. And it didn't fit anymore. My outfit ended up looking like Pocahontas met Mad Max. Then I spent the next two or so hours in Michael's craft store. After deliberating for quite some time, I ended up leaving with nothing I had come for, and made several simple pieces I had no intention of making, ie. these feather earrings. But then again, I never do what I plan, which is why I usually never plan to begin with.
Subscribe to:
Posts (Atom)